Create a Product Video
Turn a product reference into two short video shots, review their generation settings and results, then assemble a finished video with Smart Edit.
Make an eight-second vertical product film from a reference photo: a four-second reveal followed by a four-second detail shot. This workflow covers planning, reference reuse, generation, review, and final assembly.
The screenshots use the product reference supplied by the homepage's Beauty CGI ad example. You can follow the same steps with your own product image.
1. Add the product and brief the film
On Home, select Beauty CGI ad to load its sample photo and brief. To use your own product, remove the sample attachment, add your product photo, and update the wording.
Start with a small brief:
Create an 8-second vertical 9:16 product film for the serum
in the attached photo. Use a clean pink studio, soft light,
gentle camera motion, and a dewy skincare mood.
Keep the bottle shape and label consistent with the reference.
No people, fruit, dialogue, music, or added text.
First propose two shots and explain the workflow.
Do not generate assets yet. Reply in English.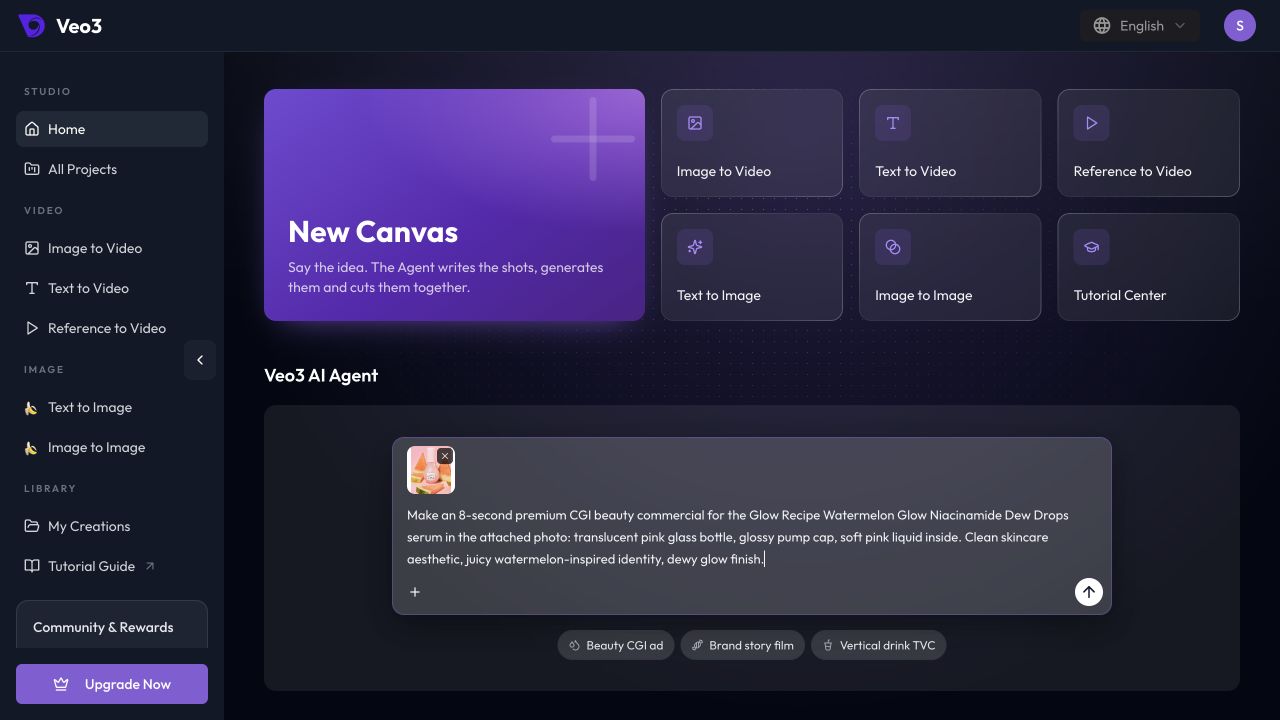
2. Approve the direction and prepare the shots
Review the proposed setting, motion, and timing. For example:
| Shot | Purpose | Direction |
|---|---|---|
| Shot 1 — The Reveal | Introduce the product | Gentle push-in on the bottle in the pink studio |
| Shot 2 — Dewy Detail | End on a product detail | Subtle camera move, followed by a steady hold |
Ask Agent to turn the plan into tasks:
Use a clean studio with no fruit.
Keep this to two 4-second shots and an 8-second final video.
Add the reference and both video nodes to the Canvas, ready for generation.
Show the model, duration, resolution, reference, and exact cost for each.
Wait for me to use the generation confirmation controls.
In Workflow, check that the reference connects to the intended shots. Select a shot's title in chat to locate its node.
3. Check the settings, then generate
Open each shot and inspect its prompt, reference, model, and Generation settings. In the pictured run, the two nodes used Seedance 2 Mini, 9:16, 720p, 4s, and Muted. These are an example setup, not a requirement for every product film.
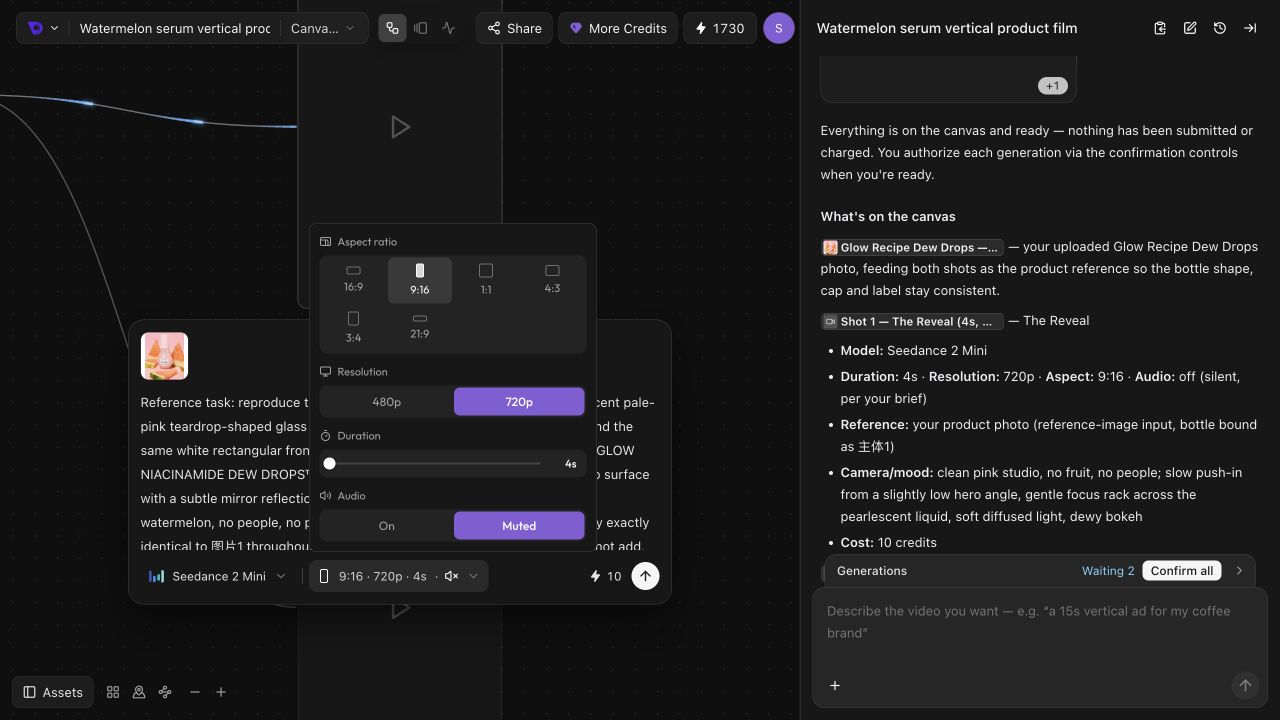
Open Generations above the chat input. Use Confirm for an individual waiting shot, or Confirm all after reviewing every currently offered task. A node's Generate control can also submit its task.
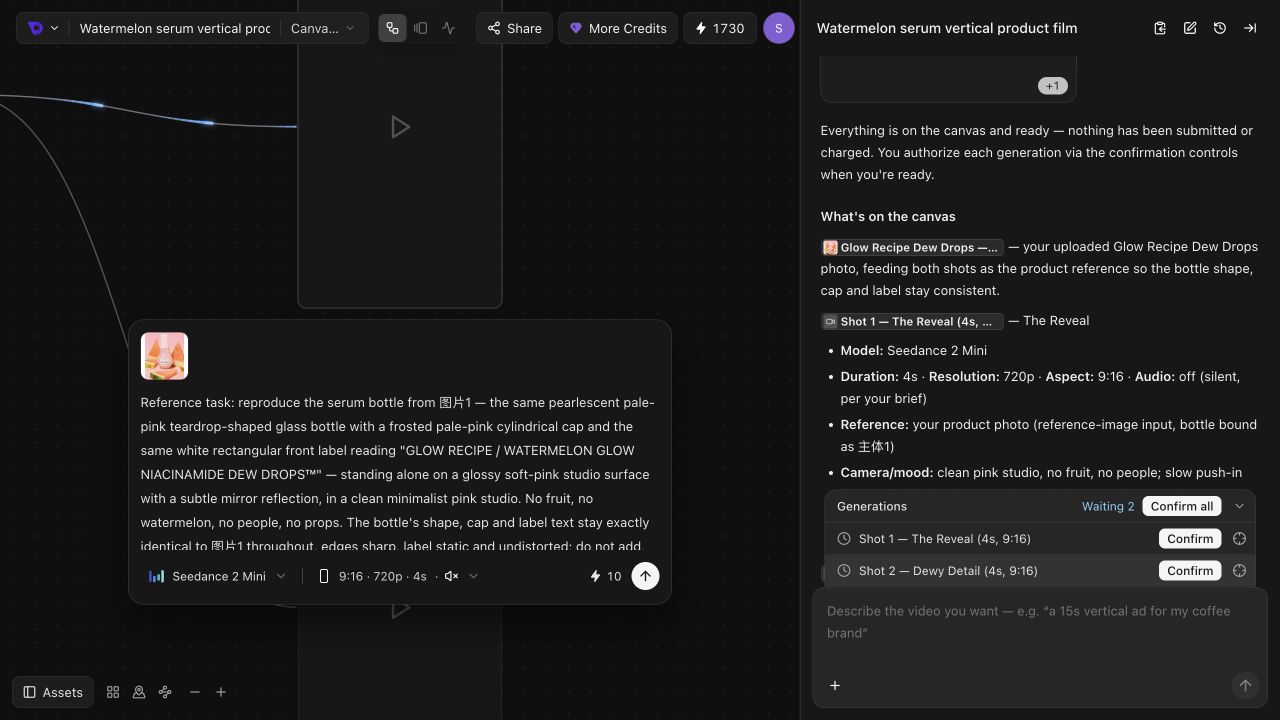
The example quoted 10 credits per shot at the time of capture. Your live quote may differ. Check it before clicking; the generation control may submit immediately without another dialog.
4. Play each shot before assembly
Open Assets → Videos and select a result. Use the preview to check the full clip, including its last frame. Agent may also review completed results and suggest a correction.
Check the product shape and packaging, readable label text, camera movement, framing, and audio. A completed task means a file was generated; it does not mean every detail of the brief is correct.
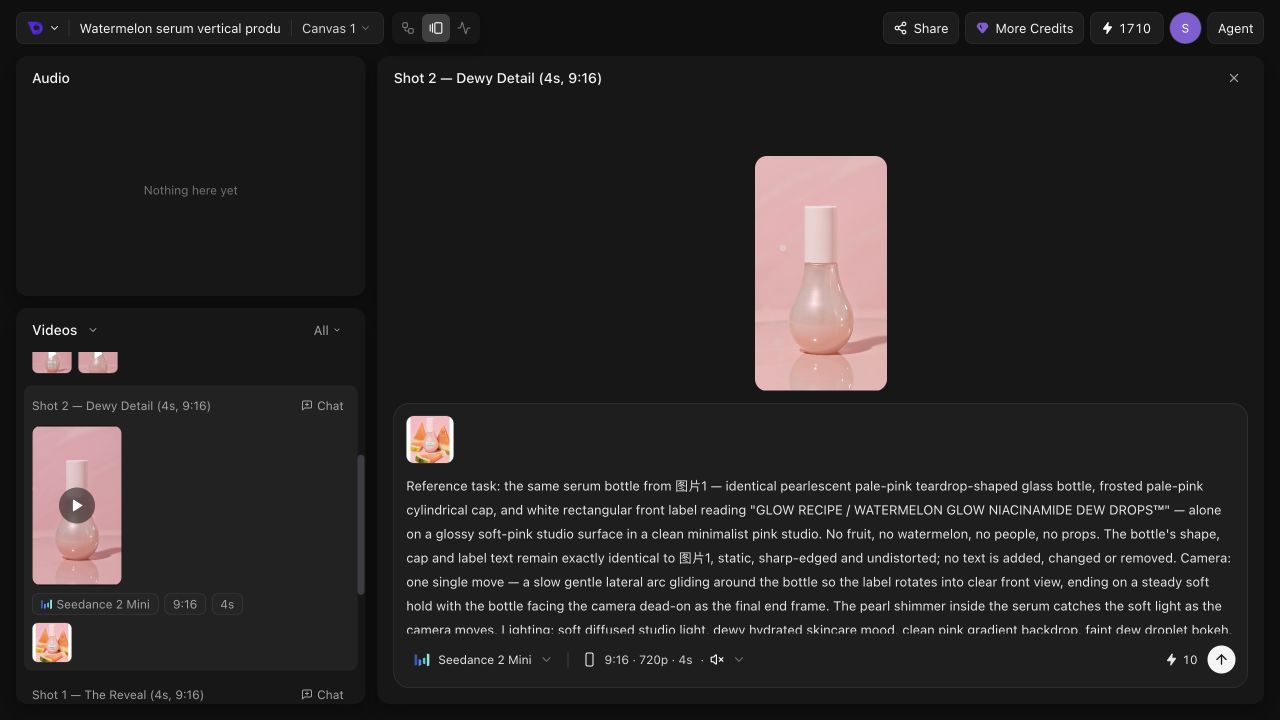
In this sample run, the product lettering was not reliably preserved. Reference photos and precise wording help guide the model, but do not guarantee exact text. If packaging fidelity matters, correct the affected shot and review it again before using the film commercially.
To request a correction, mention the affected node with @ and explain the mismatch:
The label in Shot 2 does not match the reference photo.
Prepare a revision using the original product reference.
Keep Shot 1 unchanged. Show the new settings and cost before generating.
See Refine and Reuse Your Results for separate versions and targeted edits.
5. Assemble the completed clips
When you are ready to use the two shots, describe the edit in chat:
Use the two completed shots.
Assemble Shot 1 followed by Shot 2 into one exactly 8-second
vertical video, 720 x 1280, using a hard cut at 4 seconds.
Trim each source clip to 4 seconds and keep the audio fully muted.
Preserve the original clips. Do not generate new media.
Create the composition for preview and download.
Agent prepares a Smart Edit composition node. Open it, review the plan and output format, then run it using Generate or its waiting-task confirmation control.
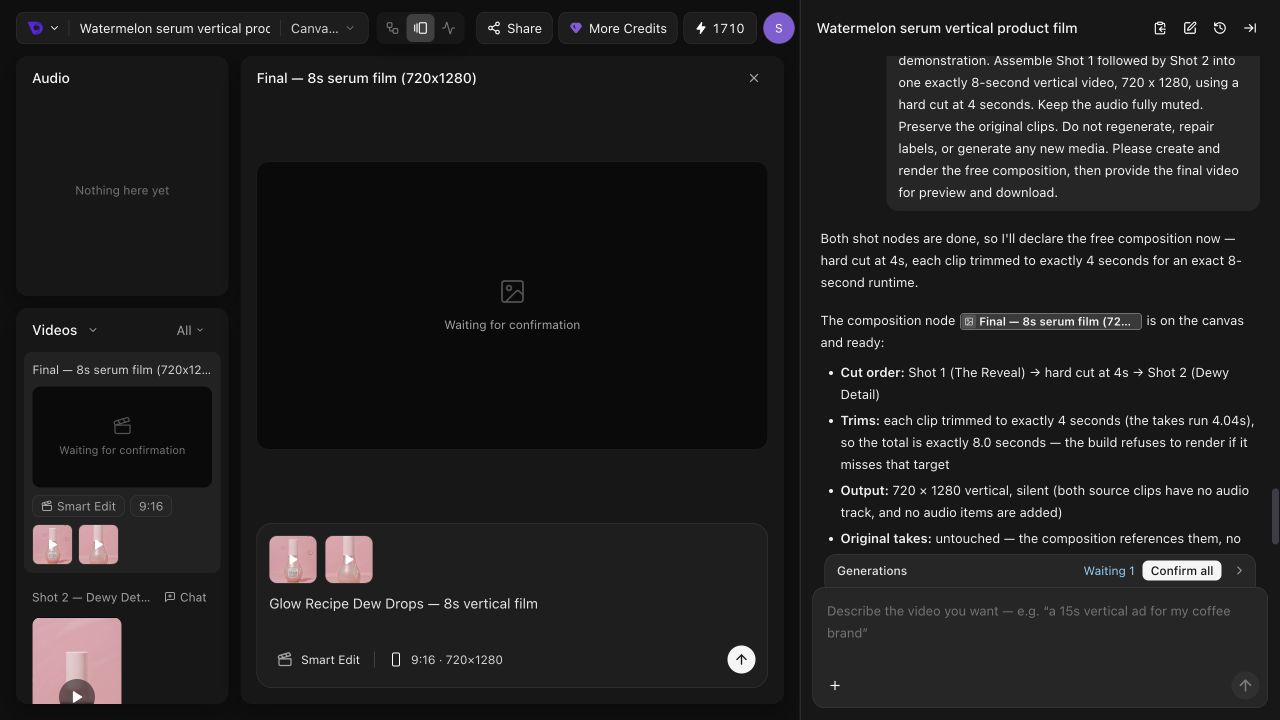
This assembly uses existing media. The sample composition displayed a cost of zero credits. Generating a replacement clip, image, or soundtrack is a separate operation with its own quote.
To change the final order or timing, describe the change in chat. The composition's output format comes from the edit plan; its card is not a video-model picker.
6. Review and download the final video
Wait for the final video to become playable. Open the composition result and check that Shot 1 comes first, the cut happens at four seconds, the end is not cut short, and the audio matches your request.
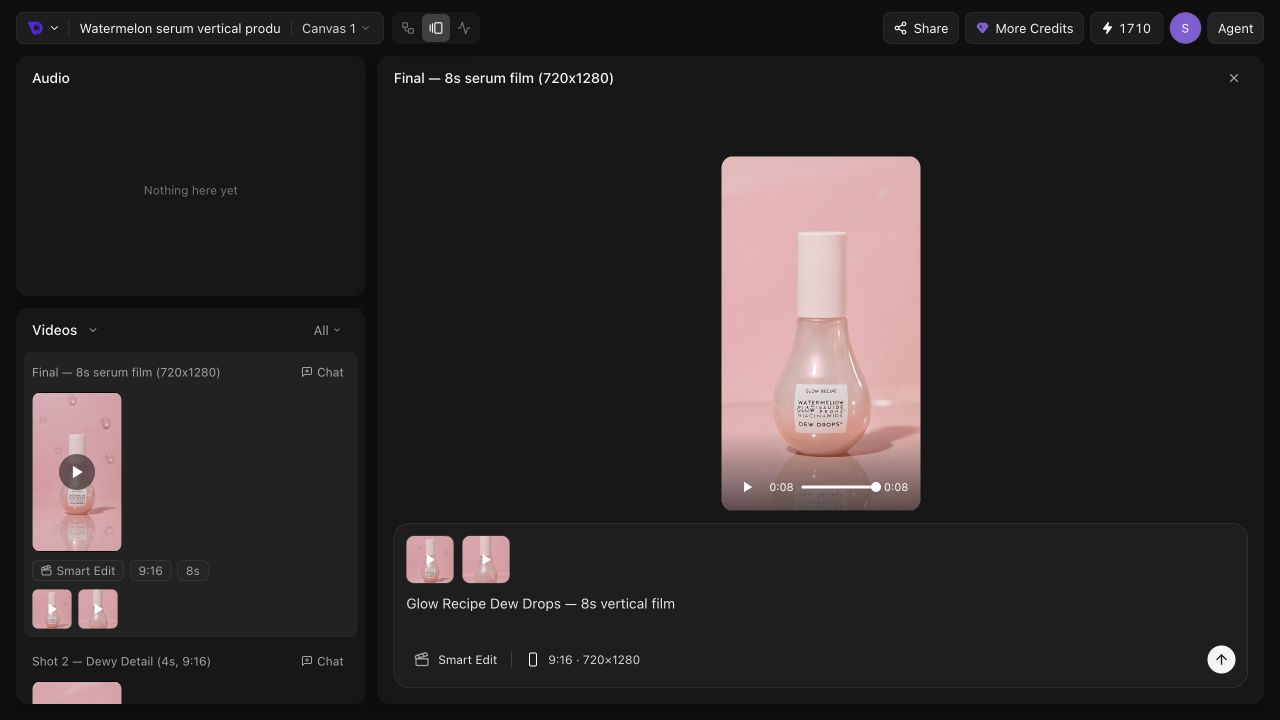
Use Download in the preview to save the file. Your original shots remain in the project, so you can return later and request a different edit without starting the entire film again.
For a task that is waiting or has failed, use Agent Troubleshooting.
Refine and Reuse Your Results
Give precise feedback, create a separate generated version, and distinguish image annotations from AI changes and video composition.
Agent Troubleshooting
Find the next step when an Agent plan has no outputs, a node is waiting, a reference is missing, or a generation needs revision.