Add References and Avatars
Give Veo3 AI Agent clear reference material, explain what each file controls, and browse avatars before planning a generation.
Add reference material when the result needs to match a particular product, person, setting, or existing clip. Tell Agent what each reference should control and which details must remain unchanged.
Add material to your message
In the Canvas chat, select + / Add attachment. The menu offers three sources:
| Source | What to do |
|---|---|
| Upload from device | Choose an image, video, or audio file from your device |
| My Creations | Browse the available creations and select a reference image |
| Select Avatar | Browse your avatars or public avatars |
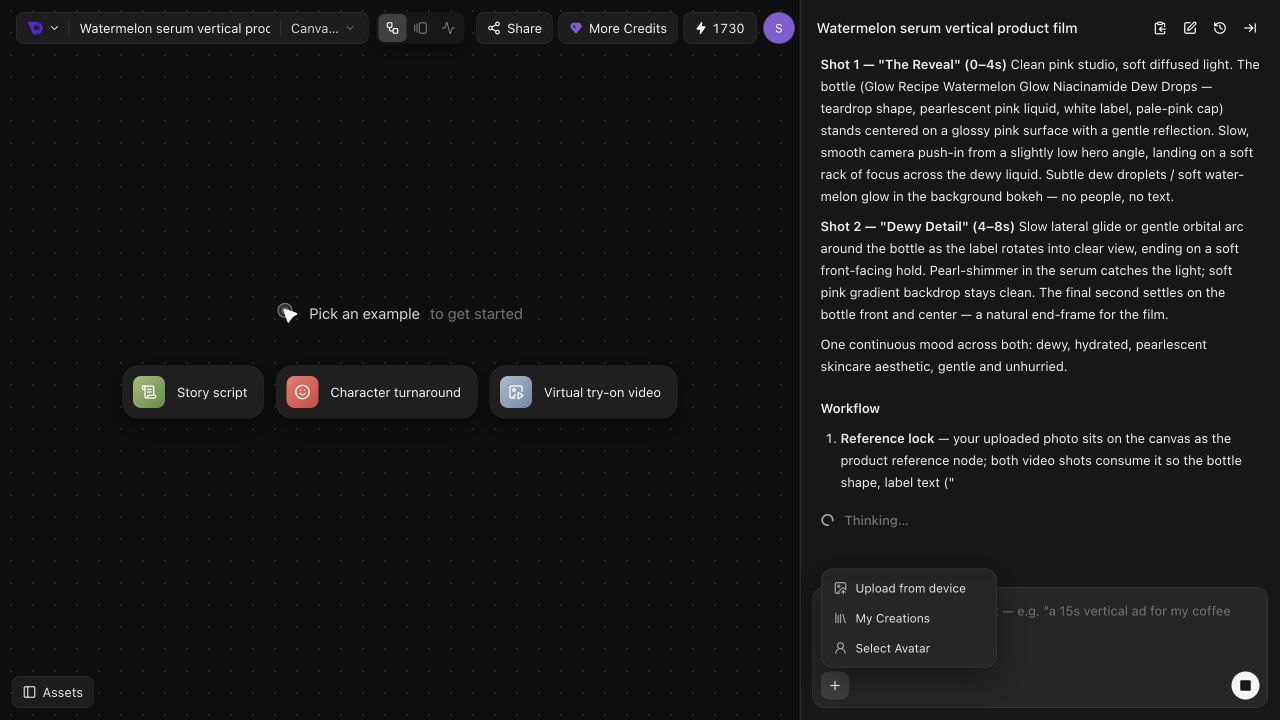
For a product film, start with a clear product photo:
- Select Upload from device and choose the photo.
- Wait for the upload to finish and check that the attachment appears in the message.
- Describe the film and the details the photo should preserve.
- Select Send.
You can also drag a supported media file into the chat input area. Follow any file or attachment limit shown in the interface. Paste a written brief directly into the message.
Use the attached bottle photo as the product reference.
Create an 8-second vertical 9:16 product film in a clean pink studio.
Keep the bottle shape, pump, label layout, and label text consistent with the photo.
Use soft lighting and gentle camera motion. No people, music, or added text.
First propose two shots. Do not generate assets yet.
If you start with a homepage example such as Beauty CGI ad, check the draft before sending: the example adds both a prompt and a product image. Replace that image and update the product description when using your own product.
Give every reference a job
When attaching several files, identify them by filename or a clear visual description. Separate the subject you want to preserve from the style you want to borrow.
| Material | Explain its role |
|---|---|
| Product photo | Exact product appearance, packaging, proportions, and label |
| Person or character image | Identity, clothing, and details that should stay consistent |
| Setting or style image | Lighting, colors, background, or framing to borrow |
| Existing video | Which clip to work from and what action or timing to preserve |
| Audio file | Whether it is intended for the finished soundtrack or as a reference |
The bottle photo defines the product. Keep its packaging unchanged.
The pink studio image is a lighting and background reference only.
Do not copy the product shown in that studio image.
Plan a close-up followed by a wider hero shot using the same bottle.
Uploading a file gives Agent material to work with. Before generation, check that the planned shot uses the intended reference. Different generation models accept different combinations of images, video, and audio; ask Agent to explain the proposed setup if the role is unclear.
Check the displayed quote before selecting Confirm, Confirm all, Generate, or Save as variant. These controls can submit generation directly. On a generated image, Save as variant creates and runs a new paid version without a separate confirmation dialog.
Refer to a specific Canvas node
Use a node mention when your request concerns a particular reference or shot already on the Canvas.
- Type @ in the chat input to open the Nodes menu.
- Select the reference or shot you mean, such as Shot 2.
- Check that a chip with the node's title appears in your message.
- Add the instruction beside that chip, then select Send.
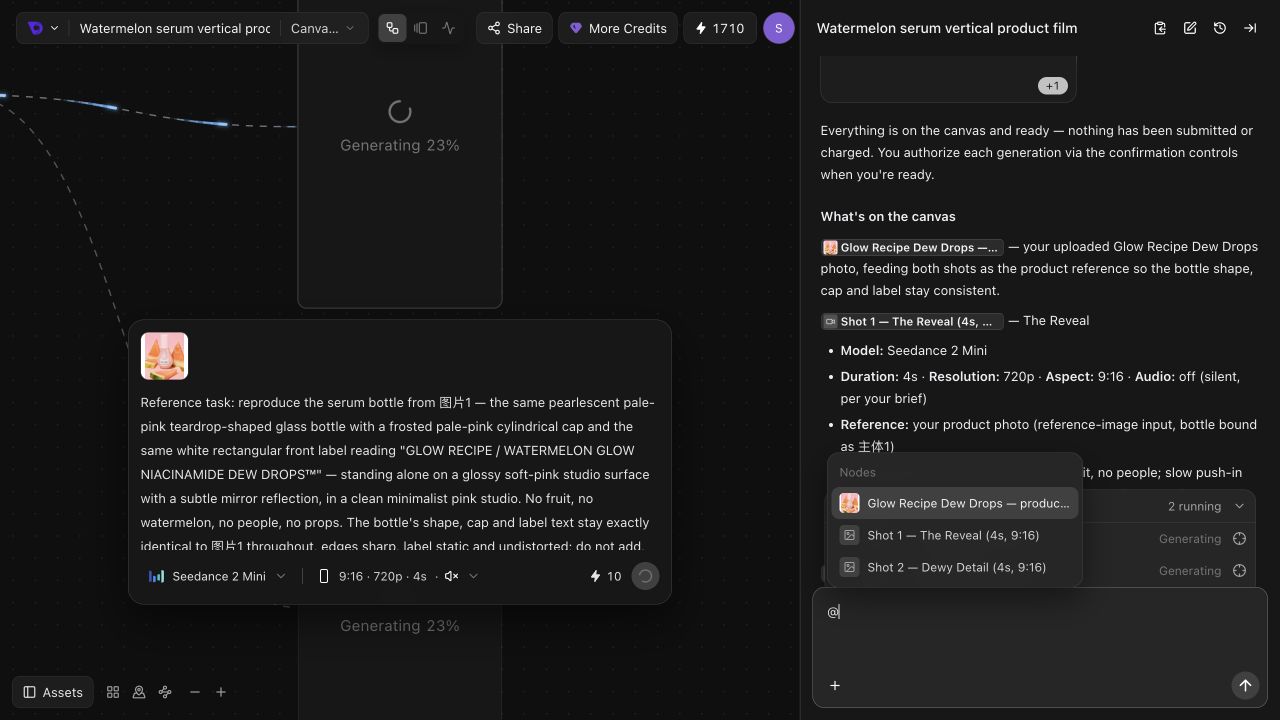
For example, select the Shot 2 node, then write:
Reduce the camera motion in this shot to a slow push-in.
Keep its product reference, lighting, and duration unchanged.
Keep Shot 1 as it is. Show the revised setup before generation.
The chip identifies the node; your words specify what should change.
Browse an avatar
Open Add attachment → Select Avatar. The picker includes My Avatars, Create Avatar, and Public Avatars.
- Open an available avatar to inspect its details.
- If a voice preview is shown, play it before choosing.
- Select Use this avatar.
- Describe the avatar's role, appearance, action, and any spoken words in the chat.
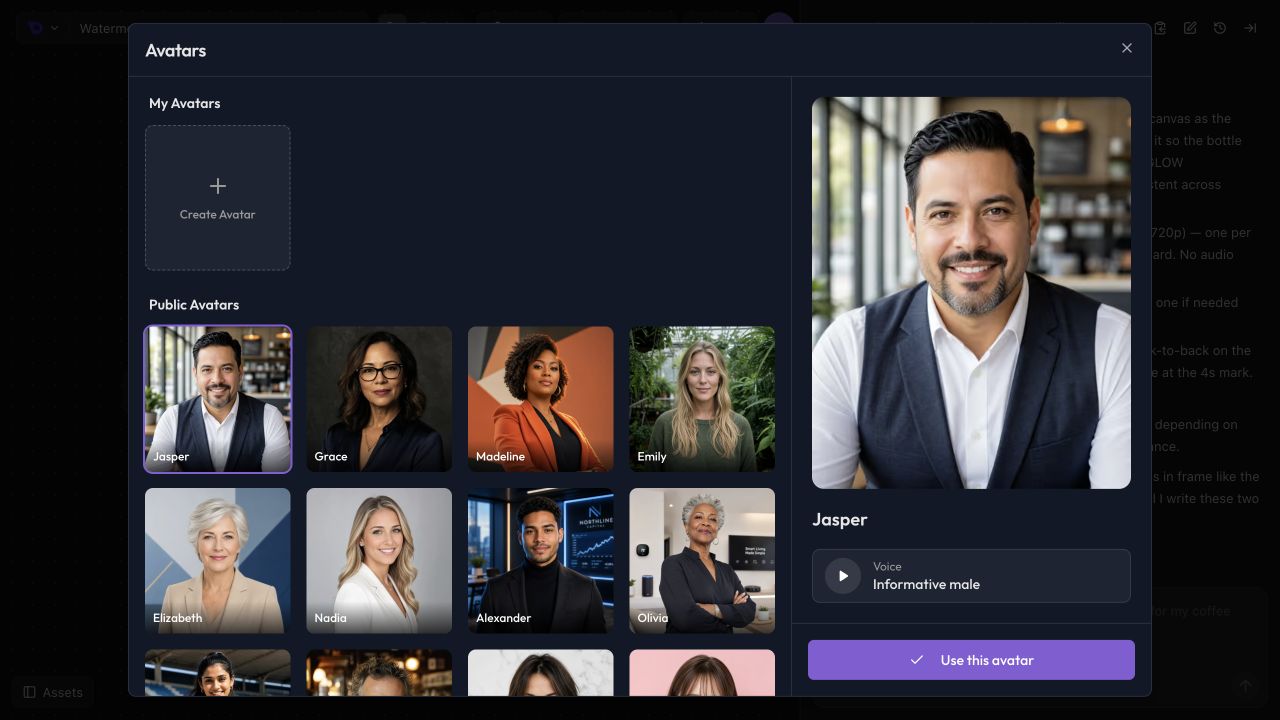
For a speaking scene, write the dialogue exactly and state its language. Ask Agent to propose the workflow before generation so you can review how the character, speech, and video will be produced.
Plan a short presenter scene using this avatar.
Use a simple studio and a medium shot.
The presenter says, in English: "Meet your new morning ritual."
Keep the delivery calm and conversational. No subtitles or background music.
Show me the plan and generation settings before creating anything.
Review the reference in the result
Check product shape, visible text, facial details, clothing, and framing. References guide generation; review the actual result before using it in a final film.
If something drifts, identify one concrete mismatch and the reference it should follow:
The bottle cap in the second shot is too tall.
Use the original attached product photo to correct the cap proportions.
Keep the first shot, lighting, framing, and camera movement unchanged.
Show the revised generation setup before running it.
For more detailed reference planning, see Face Consistency and AI Video Asset System. If a file is missing or a generation cannot proceed, see Agent Troubleshooting.
Write a Clear Creative Brief
Describe your goal, references, visual direction, and next step so the Agent can propose a focused plan and respond to useful feedback.
Work in Canvas
Find connected shots, inspect generation settings, browse project assets, and keep your Agent conversation focused on the right node.